
This is the documentation draft for "Kinogram mode"
The first post contains the documentation that will go in the manual and you can post comments to add feedback or discuss points that are unclear.
---------------------------
Introduction
The Kinogram mode is used to display multiple images of the video at the same time. It is useful to create single-image summaries of the motion.
The two main use-cases for Kinograms are the full decomposition of the motion, typically using a large grid at regular intervals (fig. 1), and the creation of reports highlighting the posture at standard key moments of the motion, using fewer images at non regular intervals (fig. 2).

Fig 1. Example of full decomposition
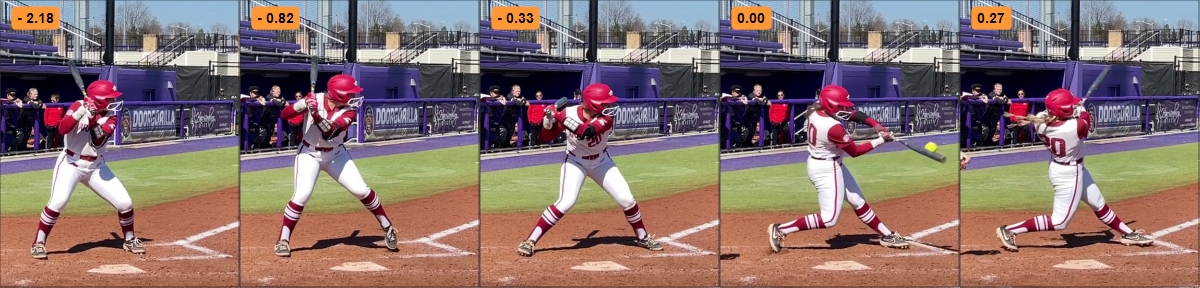
Fig. 2. Example of key points
To enter the Kinogram mode, use the menu Video > Kinogram. To exit the Kinogram mode right click in the image background and use the menu Exit Kinogram. Alternatevely, use the exit button at the top right of the playback screen or select another video mode.
Tip
The Kinogram mode is only enabled when the entire working zone is cached in memory. To change the amount of memory used for the cache go to Options ‣ Preferences ‣ Playback ‣ Memory.
General
When the Kinogram mode is activated the main viewport displays a collection of frames taken from the video, by default spaced at regular intervals.
The playback controls are still active and the current frame is highlighted in blue. The drawing tools can be used to add annotations on top of the composite.
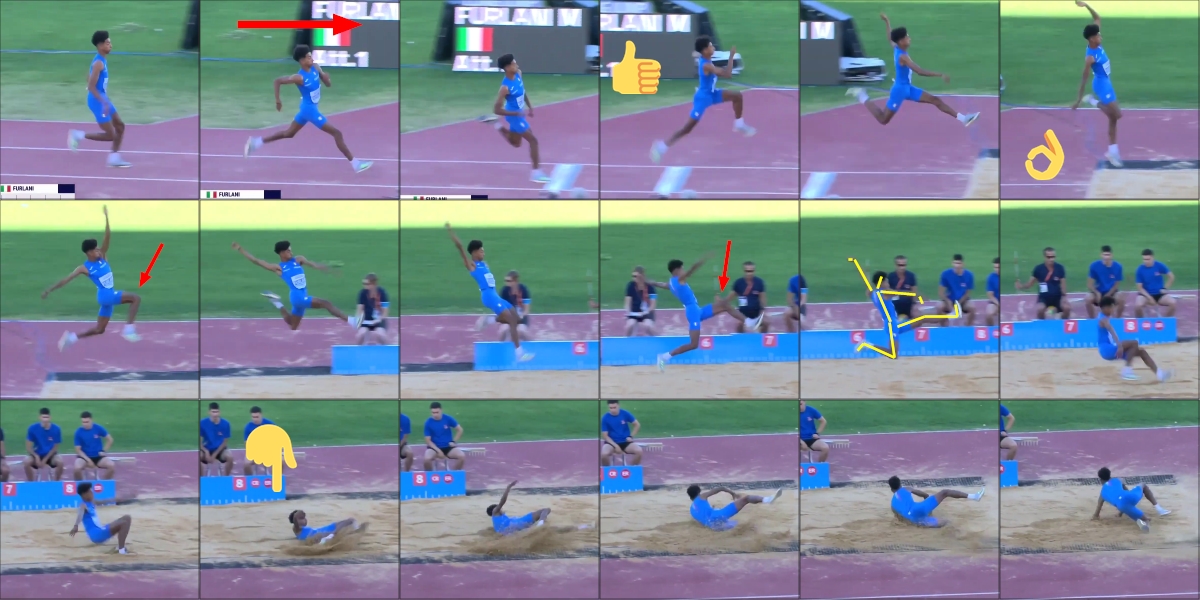
Fig. 3 Annotations on top of Kinogram
Tip:
The Kinogram viewport is at the same aspect ratio as the original video, but the result can be saved at higher resolution and will not include the empty areas outside the Kinogram itself.
Adjusting the content of the cells
Using the left mouse button drag the tiles around to select which part of the original image should be displayed inside a particular cell.
To adjust the time reference of a cell, use ALT key and scroll backward or forward with the mouse wheel while hovering above the cell.
Parameters
The parameters of the Kinogram can be controlled by using right click and selecting the menu Configuration…
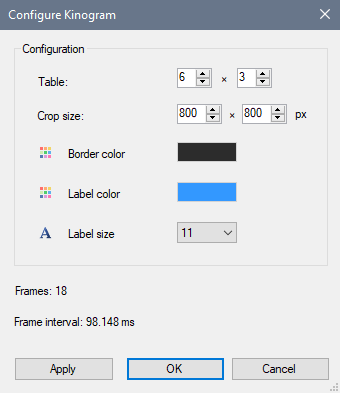
- Table : The number of columns and rows of the Kinogram.
- Crop size : the size of the area of the original images extracted into the cells of the Kinogram.
- Border color : Color of the border between the cells.
- Label color: color used for the time or frame number labels.
- Label size: font size used for the time or frame number labels.
Tip:
All options in this dialog change the Kinogram in real time, except for the crop size. Use the Apply button to integrate crop size changes without quiting the configuration dialog.
Toggles
Other options are available via the Options menu.
- Right to left : Enable this if the athlete is moving right-to-left. This configures the Kinogram to use the top-right cell as the first cell and progress right to left for each row.
- Show border: whether to show the outline of the cells.
- Auto-interpolate: when this option is enabled dragging the cell content will automatically interpolate the neighboring cells to match the motion. If this is disabled you can still trigger it manually by using the menu Action > Interpolate tiles.
Information labels
Small labels giving information about each cell can be shown by using the Labels menu.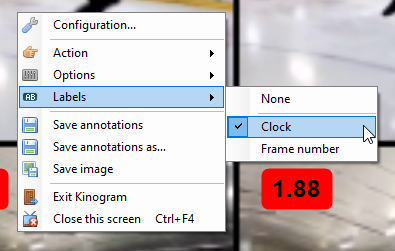
- Clock: shows the time of the image in the cell, taking into account the time origin and scale if configured.
- Frame number: shows the cell index within the Kinogram.
The labels can be moved around by dragging. To move all the labels at once, use the SHIFT key while dragging them. This is typically used to move all the labels to a particular corner of their cell.
To reset the labels to their default location use the menu Action > Reset label positions.
tip:
The time shown uses the global time code format option, you can change this from menu Options > Time.
Saving
The Kinogram configuration is saved as part of the KVA file (menu Save annotations…) and will be restored when the video is opened again.
To save the Kinogram image itself use the menu "Save image" in the context menu of the Kinogram. This will ask for the output image size. Since the Kinogram is a composite of images of the original video you may save it at a larger resolution without loosing quality.