I'm happy to announce the general availability of Kinovea 0.8.25.
This post describes some of the improvements in version 0.8.25 over version 0.8.24.
This release focuses on usability and polishing of existing features, and introduces one new feature in the Capture module.
1. General
Starting with version 0.8.25 a native x64 build is provided. There are now 4 download options. The `zip` files are the portable versions and will run self-contained in the extraction directory. The `exe` files are the installer versions.
The minimum requirements have not changed and Kinovea still runs under all Windows versions between Windows XP and Windows 10.
The interface is now translated to Arabic thanks to Dr. Mansour Attaallah from the Faculty of Physical Education, Alexandria University - Egypt.
2. File explorer
Thumbnails details
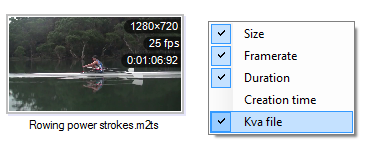
The details overlaid on the thumbnails have been extended and made configurable. The framerate and creation time have been added to the fields that can be displayed, the framerate is displayed by default. Right-click the empty space in the explorer to bring the thumbnails context menu and choose the fields you would like to be shown.
3. Playback module
Interactive navigation cursor
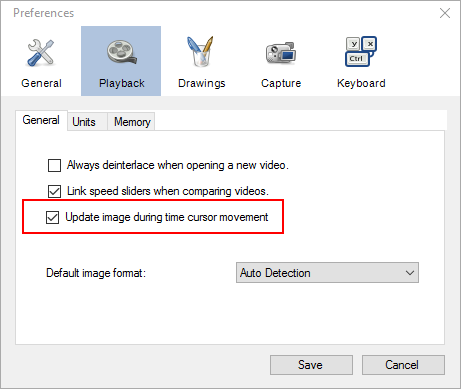
The video now updates immediately when moving the playback cursor. This behavior was previously only activated when the working zone was entirely loaded in memory. It is now enabled by default. The experience should be largely improved but if you are on a less powerful system and navigation is problematic, the behavior of the cursor can be reverted from Preferences > Playback > General > "Update image during time cursor movement".
Video framerate
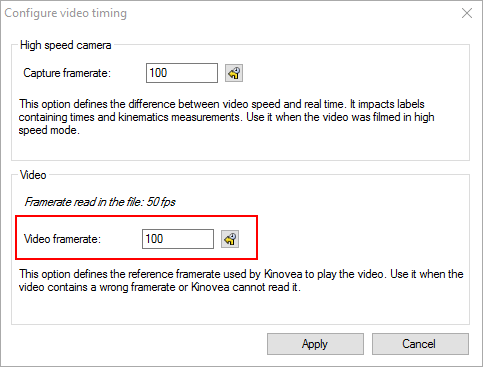
The internal framerate of the video can be customized from the bottom part of the dialog in Video > Configure video timing. This setting changes the "default" framerate of the video by overriding what is written in the file. This is a different concept than slow motion. What the setting does is redefine the nominal speed of the video, the 100%. This is useful when a video has a wrong framerate embedded in it which can happen sometimes. In general use you would not use this setting very often but it can save an odd file. Note that this setting is also not the same as the Capture framerate that can be set from the same configuration box.
4. Annotation tools & measurements
Named objects
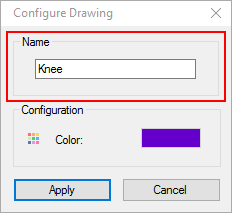
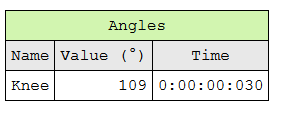
All drawing tool instances (angles, arrows, markers, chronometers, etc.) now have a custom "Name" property. This makes it easier to match drawings with their value when exporting data to spreadsheet. Regarding spreadsheet export, all lines and point markers are now exported to the spreadsheet, whether or not they have the "Display measure" option active in Kinovea.
Custom length unit
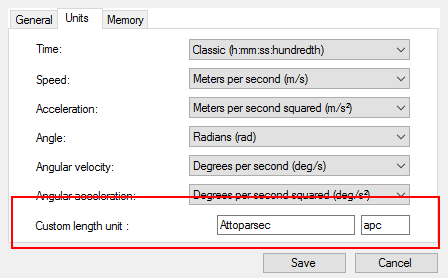
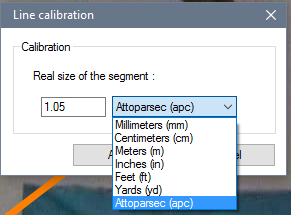
A new custom length unit can be used to cover use-cases that are not natively supported by Kinovea. By default Kinovea natively supports Millimeters, Centimeters, Meters, Inches, Feet and Yards. The extra option can be used to define a new unit such as Micrometers or Kilometers depending on the scale of the video being analyzed, or any unit specific to your field. The default value for this option is "Percentage (%)". The percentage unit would make sense when analyzing dimensions of objects purely relatively to one reference object. The mapping between video pixels and real life dimensions in the custom unit is defined by a calibration line, or a calibration grid for non-orthogonal planes. Any line or grid can be used as the calibration object.
The unit is defined in Preferences > Playback > Units > Custom length unit. It can then be used in any line or grid during calibration.
Default tracking parameters
A default tracking profile can be defined from Preferences > Drawings > Tracking. This profile will be applied by default to newly added tracks and trackable custom tools like the bikefit tool or the goniometer. The parameters can be expressed in percentage of the image size or in actual pixels. Note that in the case of tracks, the tracking profile can also be modified on a per-object basis after addition. This is not currently possible for other objects.
![]()
5. Capture module
File naming automation
The file naming engine has been rewritten from scratch to support a variety of automation scenarios that were not previously well supported. The complete path of captured files is configured from Preferences > Capture > Image naming and Preferences > Capture > video naming.
A complete path is constructed by the concatenation of three top-level values: a root directory, a sub directory and the file name. It is possible to define a different value for these three top-level variables for the left and right screens and for images and videos. The sub directory can stay empty if you do not need this level of customization. Defining root directories on different physical drives for the left and right screens can improve recording performances by parallelizing the writing.
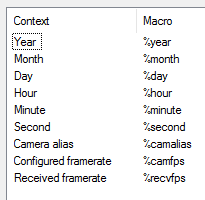
The sub directory and the file name can contain "context variables" that are automatically replaced just in time when saving the file. These variables start with a % sign followed by a keyword. In addition to date and time components you can use the camera alias, the configured framerate and the received framerate in the file name.

The complete list of context variable and the corresponding keyword can be found by clicking the "%" button next to the text boxes.
A few examples:
    Root: "C:\Users\joan\Documents"
    Sub directory: "Kinovea\%year\%year%month\%year%month%day"
    File: "%year%month%day-%hour%minute%second"

    Result: "C:\Users\joan\Documents\Kinovea\2016\201608\20160815\20160815-141127.jpg"
Root: "D:\videos\training\joan"
Sub directory:
File: "squash - %camalias - %camfps"
Result: "D:\videos\training\joan\squash - Back camera - 30.00.mp4"If the file name component does not contain any variable, Kinovea will try to find a number in it and automatically increment it in preparation for the next video so as not to disrupt the flow during multi-attempts recording sessions.
Capture mosaic
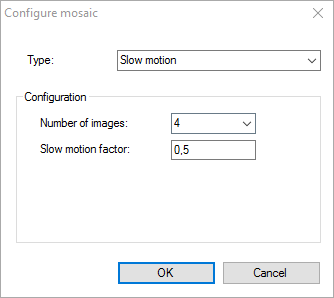
The capture mosaic is a new feature introduced in Kinovea 0.8.25. It uses the buffer of images supporting the delay feature as a source of images and display several images from this buffer simultaneously on the screen. The result is a collection of video streams coming from the same camera but slightly shifted in time or running at different framerates. The capture mosaic can be configured by clicking the mosaic button in the capture screen:

Modes:
1. The single view mode corresponds to the usual capture mode: a single video stream is presented, shifted in time by the value of the delay slider.
2. The multiple views mode will split the video stream and present the action shifted in time a bit further for each stream. For example if the delay buffer can contain 100 images (this depends on the image size and the memory options) and the mosaic is configured to show 4 images, then it will show:
the real time image;
a second image from 33 frames ago;
another one from 66 frames ago;
and a fourth one from 100 frames ago.
Each quadrant will continue to update and show its own delayed stream. This can be helpful to get several opportunities to review a fast action.
3. The slow motion mode will split the video stream and present the action in slow motion. Each stream runs at the same speed factor. In order to provide continuous slow motion the streams have to periodically catch up with real time. Having several streams allows you to get continuous slow motion in real time.
4. The time freeze mode will split the video stream and show several still images taken from the buffer. The images are static and the entire collection will synchronize at once, providing a new frozen view of the motion.
6. Feedback
Feel free to use this post for feedback, bug reports, usability issues, feature suggestions, etc.
