Using overlay grids
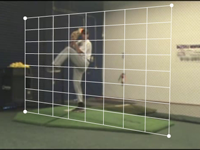
1. Using the flat grid
Toggle the menu Image > Grid. A grid is displayed on the image.
The flat grid allows you to make observations on a plane strictly perpendicular to the camera axis.
Move the grid by drag and drop and resize it using the circular handles at corners.
Note: The number of divisions can be adjusted by right clicking the grid then using the Configure menu.
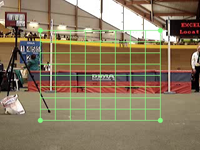
2. Using the perspective grid
Toggle the menu Image > Perspective Grid.
Use the circular handles at the corners to map the grid on a rectangular plane, visible or virtual.
For instance place the grid on a plane that would be perpendicular to the ground to make a visualization guide.
To expand the grid while keeping the mapping on the same virtual plane, hold the CTRL key down during the drag and drop. The number of divisions is also adjustable through the context menu Configure.
Note: You can also toggle the perspective grid display with the dedicated button on the tool bar of the player screen  .
.
3. Changing grids color
Display the configuration dialog box of a grid by double clicking on it. Change the grid color so as to have a good contrast with the video content.
See also: